You can install Event Espresso via the WordPress Dashboard or via FTP.
Event Espresso comes bundled with various addons, depending on your license type. Each of these needs to be treated like a separate add on when installing. You can install them all in one go, or as you need to, the choice is yours.
This tutorial will guide you through the process of installing the core Event Espresso plugin (all the add ons follow the same procedure) using both WordPress and FTP.
The Custom Files (NOT the Custom Templates Add-on) and Espresso Services API (currently used for the Android app only) add-ons must not be uploaded via WordPress, but must be uploaded via FTP. Please see the readme.txt files in the add on zips and this documentation: Custom Files Add-on and Espresso Services API.
Installing via the WordPress Dashboard
Step 1 – Download Event Espresso and Add Ons
You can download Event Espresso and all the add ons available to your licence via your Account page.
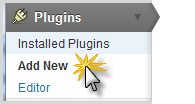
Step 2- Login to WordPress and Upload
Start by logging into your websites WordPress dashboard and then navigate to Plugins > Add New
Click Upload

Click Browse

Find the plugin files and click “Install Now”
If you receive this error after trying to upload the plugin file: “The uploaded file exceeds the upload_max_filesize directive in php.ini” you will need to increase the upload file size settings in your WordPress wp-config.php file or the php.ini file on the server.
Click “Activate Plugin”

Event Espresso is now installed! Simply repeat the process for your add ons.
Installing via FTP software
What is FTP?
FTP stands for File Transfer Protocol which simply means a system for transferring files from your computer to the server that hosts your website. FTP software acts in a similar way to file explorers such as Windows Explorer.
There are lots of free FTP programs available, such as FileZilla.
Step 1 – Download Event Espresso
You can download Event Espresso and all the add ons available to your licence via your Account page.
Step 2 – Extract the Files
In order to extract (unzip) the zip files you may need to obtain a third-party program such as WinRar or 7Zip. Windows 7 and Vista users can right-click and “Extract All” via Windows Explorer.
Either way, choose where you want them to be extracted to.
In this example they will be saved to a folder on the desktop called eventespresso.

Step 3 – Log on to your Server
Open up your FTP program and log in. You will need your FTP details: hostname, username and password, which can be obtained from your hosting provider.

Press Quickconnect
The FTP program will log into your server. Your screen is split into two. The left hand side is your computer, the right hand side is your websites server.
Step 4 – Navigate to the correct folders
In the left hand side, make sure you are in the correct folder where you extracted the plugin to on your computer.
In the right side, navigate to the plugin folder:
yoursite/wp-content/plugins


Step 5 – Upload the Plugin
Drag and drop the plugin folder from the left hand side to the right hand side, or right-click the folder on the left hand side and select upload.
Go grab a drink or check your emails, the upload process will take a while.
Step 6 – Activate!
Log in to WordPress and navigate to Plugins > Installed Plugins. Find the Event Espresso (or add ons) and click Activate.

Event Espresso is now ready to use.