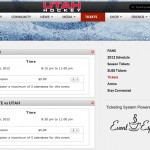
The Volume Discounts add-on allows event managers to apply a bulk discount to events when registrations match a specific number of tickets or a certain total dollar value for the registration. In this article, we will look at how to use Volume Discounts to allow people to sign up for season tickets. You can take a look at how we used this plugin to power the University of Utah Hockey’s Season Tickets for more information.
[s2If current_user_can(access_s2member_level1)]
Setting up Volume Discounts and Multi Event Registration for Season Tickets
Step 1 – Multi Event Registration
Download and install the Multi Event Registration addon like any other plugin. This will automatically create the “Add to Cart” links. No set up is required for this addon. However, you will need to add a shortcode to your season tickets page that will add all the events to the shopping cart.
The shortcode to add a series of events to the cart in one step looks like this:
[ESPRESSO_CART_LINK event_id="6-7-8-9-10-11-12-13-14-15-16-17-18-19" direct_to_cart=1 moving_to_cart="Redirecting to cart..."]
Each number in the event_id parameter is the event id for that event (not to be confused with the “Unique Event Identifier”). The event id can be found on the Event Overview page in your dashboard. More information on how to set up the shortcode for the Multi Event Registration can be found here.
Step 2 – Volume Discounts
This is where we offer a discount off the total amount of the tickets purchased. For example, if you would like to offer a 50% discount once the shopping cart total reaches $70.
Set up:
Download and install the Event Espresso Volume Discount (free for a limited time!) addon from your account page. You will need to sign up to the Pre Release channel first.
It is recommended to create categories for your events. Then you can set it up so that categories of events get the discount. However, if you are not using categories, then you have to set the volume discount settings to “All Categories”.

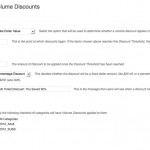
In this example, the discount threshold starts at $70. Then the system applies a 50% discount the total price of the combined registrations.

Step 3 – Default Number of Tickets (optional)
If you plan on having lots of recurring events with single prices. You may want the default number of tickets to start at 1 (or any number greater than 0). Otherwise the registrant will have to click each ticket selection field at least once.
Set up:
Download and install the Custom Files addon (does not install like a standard plugin, read the manual).
To force the ticket selection field to start at 1. Add the following piece of PHP code to the ‘wp-content/uploads/custom_functions.php’ file.
if (!function_exists('event_espresso_multi_qty_dd')) {
function event_espresso_multi_qty_dd($event_id, $price_id, $qty, $value = '') {
$counter = 0;
do_action('action_hook_espresso_log', __FILE__, __FUNCTION__, '');
?><select id="price_id-<?php echo $event_id; ?>" class="price_id" name="price_id[<?php echo $event_id; ?>][<?php echo $price_id; ?>]"> <!--?php
for ($i = 0; $i <= $qty; $i++):
$selected = ($i == $value) ? ' selected="selected" ' : '';
$i = $i == 0 ? 1:$i;
?--><option selected="selected"> value="<!--?php echo $i; ?-->"><!--?php echo $i; ?--></option> <!--?php endfor; ?--> </select>
<!--?php
}
}
</pre-->
The above custom function will not work if your event has multiple prices since it will not know which one to use. You can only use the above code if your event(s) have a single price option.
Do you have other ideas or uses for the Volume Discounts add-on? Let us know in the Volume Discounts thread in the Pre-Releases forum and we can add more use cases or documentation based on how you are using it.
[/s2If]
[s2If !current_user_can(access_s2member_level1)]
[/s2If]

