Event Espresso version 3 Documentation for the General Settings
The General Settings section is comprised of six sections
- Organization Settings
- Page Settings
- Email Settings
- Optional Event Settings
- reCAPTCHA Settings
- Support Licence
Organization Settings
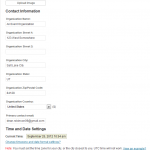
It is important that you fill out this section and make sure the details are correct. These settings tell Event Espresso who you are and will be used again and again throughout the event creation process.
Company logo: add your logo here to enable branding of your invoices, tickets, certificates and payment templates. We recommend that the image be 400px or less.
Contact information: all of your basic contact information. Your organization’s name will appear on all of your correspondence. Make sure you add your organization’s country as this determines what currency is shown. The email section here is where all notifications will go to so make sure its correct.
Time & date: choose the correct time zone to ensure that your event registrations open and close at the correct time.
Page Settings
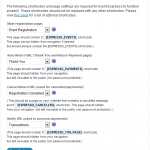
There are a number of pages that you need to have for Event Espresso to function correctly, and when the plugin is installed, it creates 4 default pages for you to use.
Most of these should be excluded from your website navigation. If you are using a WordPress 3.0+ theme with navigation support then you can do this by omitting the pages from the menu you create at Appearance > Menu.
If your theme does not have nav menu support you can use the Exclude Pages from Navigation plugin.
- Main Registration page – the plugin will create a page called Event Registration, which will contain the
[ESPRESSO_EVENTS]shortcode and will display your events. - Auto Return URL – the plugin creates a page called Thank You, and this is where the users are sent when they have completed the signup process.
- Cancel Return URL – the plugin creates a page called Registration Cancelled, and this is where the user will be sent when a payment is cancelled.
- Notify URL – a page called Transactions is created. It is used behind the scenes to process the payments.
The Main Registration page can be in your navigation (or not) if you wish. The other pages MUST NOT be in your navigation menu.
The page settings let you adjust these pages. If you change one of the default pages then you must insert the corresponding shortcode into the page.
So, for example, if you change the Main Registration page, you must insert the [ESPRESSO_EVENTS] shortcode.
Email Settings
Overall email settings. These cover all emails sent via Event Espresso.
Send payment confirmation emails?: Toggles whether the user receives a system generated email confirming payment.
Send registration confirmation emails before payment is received?: Toggles whether the user receives confirmation of their registration before payment has been received.
Use fancy email headers?: By default Event Espresso sends emails from WordPress and the email headers (this defines what you see in the from section when the email is received) and as such displays WordPress. If you want it to display the site name instead, toggle this to Yes.
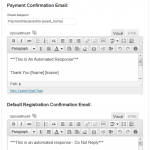
Payment confirmation email: This section allows you to customize the Payment Confirmation email that goes to users. This is for ALL events.
Default registration confirmation email: This section allows you to customize the Default Registration Confirmation email that goes to users. This is for ALL events.
Optional Event Settings
Additional options to help customise Event Espresso to meet the needs of your events.
Default surcharge: Adds a surcharge (e.g. Sales Tax) to every event. A great time saver.
Display text: Changes the Surcharge text to something else (e.g. VAT, Sales Tax).
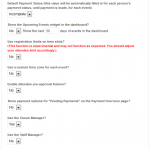
Default payment status: The default is “Incomplete”, and if you change this it will be the payment status for all event attendees. Useful in some situations, but use with care.
Show the Upcoming Events widget in the dashboard?: Adds a widget to the Admin dashboard that shows upcoming events. This is great if you are running lots of events.
Use registration limits on time slots?: Experimental function. Use with care!
Use a custom time zone for each event?: Very useful for worldwide events.
Enable attendee pre-approval feature?: If yes, the system will mark every attendee to be approved manually by the Admin.
Show payment options for “Pending Payments” on the Payment Overview page?: If this is set to yes and a user tries to make a payment and fails, it will display payment options on the return page so that the user can try again.
Use the Venue Manager?: Adds the Venue Manager option the Event Espresso menu, allowing you to add venues for your events.
Use the Staff Manager?: If you have staff, then the Staff Manager can help with organizing which staff are assigned to which event. Once activated you can also add staff details to your events by using shortcodes.
Use full logging?: Generates a file called espresso_log.txt in your uploads/espresso/logs folder. Use this when you are trying to track down a problem.
Show a link to Event Espresso in your event pages?: Support us by adding a small link to Event Espresso in your event pages. You can even generate money for yourself by adding your affiliate link there!
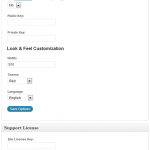
reCAPTCHA Settings
The reCAPTCHA system helps weed out automated spam registrations by making users type in words they see in a box. You will need a reCAPTCHA account, full details can be found here.
Use reCAPTCHA to block spam registrations?: Turns the function on or off.
Public key: This is obtained from reCAPTCHA.
Private key: This is obtained from reCAPTCHA.
Width: Change the width to fit into your site (in pixels).
Theme: Choose from Red, White, Blackglass, and Clean to fit into your sites overall design better.
Language: Changes the language for the interface.
Support Licence
When you purchase a licence for Event Espresso, it allows you to upgrade the plugin and add ons with the licence period. By adding your licence key here, it will enable the auto updates. You can obtain your licence key by logging into your Event Espresso account.
Event Espresso version 4 Documentation for the Settings (In Progress)
The general settings page covers most of the site wide settings that you will need. It is split up into 6 tabbed areas.
Critical Pages
This section lists the pages that Event Espresso needs in order to function. Should you wish to change a page that is used you will need to move the shortcode to the new page and then allocate it here. Otherwise your registrations will not work correctly.
This section also provides a status of the page to show you at a glance if something is not right.
Templates
This section deals with the general front end settings.
Event Listings:
These settings affect the main event listings and any listings provided by the [EVENT_LIST] shortcode
- Display Descriptions – toggle the event descriptions on or off
- Use SHORT Descriptions – if your event description contains a MORE tag, setting this to yes will cut off the event description at that point. Otherwise the full description is shown.
- Display Addresses – toggles the address on or off.
Google Maps
This section provides numerous options for the Google maps that can be added to events.
Activate Google Maps – turns it on or off.
Reg Page Map Settings
Options for maps displayed on single event registration pages.
- Set Map Width – the map width in pixels. Please just use a number and no additional information like px
- Set Map Height – the map height in pixels.
- Set Map Zoom level: Range 1 – 19 – this is the default zoom level for the map.
- Set Map Navigation Overlay – to be confirmed
- Keep Map Navigation Small – to be confirmed
- Set Map Type Control – Default Horizontal Dropdown
- Set Map Alignment – None Align Left Align Center Align Right
Events List Options
- Set Map Width – the map width in pixels. Please just use a number and no additional information like px
- Set Map Height – the map height in pixels.
- Set Map Zoom level: Range: 1 – 19 – this is the default zoom level for the map.
- Set Map Navigation Overlay – to be confirmed
- Keep Map Navigation Small – to be confirmed
- Set Map Type Control – Default Horizontal Dropdown
- Set Map Alignment – None Align Left Align Center Align Right
Your Organisation
This whole settings tab is about you and your organisation, as well as some core Event Espresso details.
Your Event Espresso License Key
This section also contains an area to add your Event Espresso licence key to allow you to get one click updates whilst you have a currently valid licence.
Contact Information and Company Logo
The contact details that you add here, including the logo, will be used in various places most prominently invoices.
Event Espresso User eXperience Improvement Program
This is an optional system to help us to improve your Event Espresso experience.
By opting to send us anonymous secure data, we will be able to tell general patterns about the plugins usage meaning we know what areas of the plugin most of our customers are using and we can put focus on improving those areas.
Admin Options
WordPress Dashboard
Upcoming Events Widget
Activates/de-activates the Upcoming Events Widget in the WordPress Dashboard so that you can see a list of upcoming events as soon as you log in.
How many days into the future?
Defines how far in the future the Upcoming Events Widget will show, in days.
Time and Date Settings
Clarification of the current date/time settings and a link the the WordPress settings.
Please note that the date and time settings are, for the most part, controlled by the WordPress settings.
Debug/Logging Options
Enable full logging
This will turn on/off the logging system to help with debugging. Th file is available at: /wp-content/uploads/espresso/logs/
Please use caution when using this feature. These files may be publicly available.
Also, please remember to turn this off after use, otherwise the file may grow very large.
Enable Remote Logging
Enables the logging file to be sent to another location.
Remote Logging URL
If the above is set to yes, this is the url where the file will be sent to, it must be a write enabled location.
Promote Event Espresso
You can help Promote Event Espresso by displaying a link to our site on each of your events. You can even generate commissions on every sale that comes from one of your links.
Link to Event Espresso in your Registration Page
This turns the link to Event Espresso on or off.
Event Espresso Affiliate ID
If you have the above on and you enter your affiliate ID here, then any sales that resulted from someone visiting Event Espresso via your affiliate enabled link will gain you a commission.
Countries
These settings are used throughout the plugin in different areas, so it’s important to get them set up.
Country name – The name of the country you are in/do business in.
Activate Country – When set to yes, the country details will be shown in various options throughout the plugin.
States/Provinces – Here you can add different regions applicable for your country.
