The following changelogs are available as records of bug fixes, new features, and timelines of Event Espresso products.
Event Espresso 4.1+ Documentation
Event Espresso 4.0
Event Espresso 4.0. 1
Events Section. 2
Events. 2
Overview.. 2
Import. 3
Default Settings. 3
Add New Event. 4
Venue Details. 5
Notifications. 5
Event Registration Options. 6
Questions for Primary Attendee. 7
Questions for Additional Attendees. 7
Event Category. 7
Event Categories. 7
Overview.. 7
Import. 7
Registrations. 8
Overview.. 8
Contact List. 9
Reports. 9
Transactions. 9
Overview.. 9
Reports. 10
View Transaction page. 10
Management Section. 10
Messages. 10
Overview.. 11
Settings. 11
Edit Message Template. 11
Registration Form.. 12
Settings Section. 13
General 13
Critical Pages. 13
Templates. 13
Event Listings: 13
Registration Pages: 13
Themes & Styles: 13
Google Maps. 14
Your Organization. 15
Admin Options. 15
Payment Methods. 15
Payment Methods. 15
Settings. 15
Affiliate Settings. 15
Extras Section. 15
Help/Support. 15
A note to existing users of Event Espresso 3.1.X
When installing/upgrading to 4.X, the whole dashboard area has undergone a transformation, so it is recommended to have a browse through the documentation to familiarise yourself with the new layout and features.
There are four main areas in the new menu: Events, Management, Settings and Extras, each one containing a variety of options and settings.
Events Section
Events
This area contains the overview of your currently, future and past events. From here you can create and edit events as well as fine tune site wide event settings.
Overview
Add New Event button – Found at the top of the page, this button will take you to the new event page. LINK TO NEW EVENT
Filters – Here you can select to view All Events, Events occurring today, or Events occurring this month. You can also filter events by month/year and by the event status LINK TO GLOSSARY
The event lists itself shows lots of information at a glance:
- Event ID
- Event Name
- Venue Name
- Event Start Date
- Event Start Time
- Reg Begins (Registration start date and time)
- Status
- Attendees – shows a split figure: attendees registered/max. attendee limit
- Actions
The Actions icons allow quick access to important features
- View event
- Edit Event
- View Registrations for that event
- View reports
- Copy short URL
- Export event details to CSV file
Also, when you hover your mouse over the individual event names, a sub menu appears
- View – view the event on the front end of your site
- Edit – edit the event
- Delete – delete the event. Note that events are not truly deleted and remain in your database and are acce4ssiable via the Deleted filter.
- Attendees – displays the attendee list for that event
- Export – exports the event data to CSV
Import
This tab displays the built in import tool for events. It allows you to upload a CSV file containing event data which will be added to your database.
Please note
Accepts .csv file types only. Maximum file name length (minus extension) is 15 characters. Anything over that will be truncated to 15 characters. Please note that you may have to experiment with the import/export settings in your particular spreadsheet program before you find ones that work the best for you.
Default Settings
These options are site wide, so all events are affected, unless otherwise over ruled in an individual event.
Events Expire on Reg End Date – If set to “Yes”, then as soon as an event’s registration end date has passed, the event will become inactive, and will no longer appear in your event listings.
Default Registration Status – This value will be automatically filled in for each person’s registration status, until payment is made, for each event.
Pending Registrations Count Towards Registration Limits – If set to “Yes”, then attendee’s whose registration status is set to “Pending” will still count towards an Event’s registration limit, and therefore also affect the number of spaces available, tickets left, and seating options (if applicable).
Add New Event
In order to add a new event you need to click the Add New Event button in the Events menu.
This will take you to the Add New Event page.
This page contains 4 tabs: Add Event, Overview, Import and Default settings.
Please note that if you click anything other than the Add Event tab, you will be taken away from that page and any data entered will be lost.
Event Title – add a title for the event, this is visible on the front end
Permalink – add a custom permalink for the event, if nothing is entered, it will use the event title.
Event Description – this is a standard WordPress editor and you can add a description and format it as well as add images etc.
Dates & Times – add in the start and end dates for the event and the registration period.
Event Pricing – add one or more prices for the event; click the Add New Event Price button to get started.
Type – Four options are available for the type of pricing
Event Price – a basic price
Member % Discount – a discounted price for members (logged in users)
Early Bird % Discount – a discounted price that is triggered by dates
Surcharge – a tax or additional fee
Name – The name that site visitors will see for this Price.
Description – An internal description for your benefit
Amount – The monetary or percentage amount
Triggered by Date – If set to yes, then the pricing will be subject to dates
Start Date – If the Triggered by Date option has been set, this is the date that pricing will become active
End Date – If the Triggered by Date option has been set this is the date that the price will expire. Please note, if you set the date to January 31st for example, the price will expire at 00:01 January 31st, so the beginning of that day.
Active – is this price in use? If so it will be displayed on the site, if not it will not be displayed.
When a price has been saved, its basic details will be shown. Next to those are two icons: The Cog icon will allow you to edit the price; the Trashcan/Bin icon will delete the price.
Venue Details
The Venue Manager is not available in the “decaffeinated” version of Event Espresso 4.X
Here you can add details of where the event will be held, which will be displayed on the event registration page, and you can even add a Google Map to help visitors find the location.
Venue Information
- Title – name of the location
- Website – website for the location if it differs from your own
- Phone – locations telephone number
- Image – add a URL to an image to add a logo, picture of the building, staff etc.
Physical Location
This is the address details of the location
Virtual Location
If the location isn’t actually a building or physical place, you can still show information regarding it.
Phone – your contact telephone number
URL of Event – the website, hangout, chat room location
Call in number – a specific number to be used to contact you during the event.
Google Map Link (for email) – details coming soon
Enable event address in Google Maps?
If this is set to Yes, then a Google map is also shown on the registration page. Click here to see documentation about the different options for Google Maps. LINK
Notifications
This area controls how emails are dealt with on an event specific basis. If you don’t need to control the individual events emails, and are happy to use the same ones across all your events, you can happily ignore this section.
There are 3 main emails for the event:
Payment Email
this is sent when payment has been made
Registration Email
This is sent after the user registers regardless of payment status (see the Settings section for an override option) LINK
Resend Registration Email
This is sent via the Attendee Overview section LINK
By default the event will use the emails created in the Messages area LINK, but you can swap these to a custom email by clicking the Switch to Custom Templates button.
When you do this, a pop up will appear and you can create the custom email. This email will only be useable by this particular event and cannot be allocated to another event.
Event Registration Options
These control important aspects of the event.
Event is Active
Yes/No. If set to no, the event will display a message that it is not yet open.
Event Status
The status of the event, the default is Public. See here for a definition of the event status (LINK TO GLOSSARY)
Attendee Limit
The maximum number of people that can register for the event.
Allow group registrations?
Allow more than one person to be registered simultaneously.
Max Group Registrants
the maximum group size that can be registered in one go.
Additional Attendee Registration info?
Three options available here:
- No info required – the additional attendees are not set up, they are just anonymous tickets attached to the Primary Attendees account.
- Personal Information Only – Just the attendees first and last name as well as email address are required. This is separate to what questions the Primary Attendee is asked.
- Full Registration Information – Every question that is selected in the Questions for Additional Attendees box is asked for each additional attendee.
Default Payment Status
There are three options here, with No Change being the default:
- No Change – uses the default site settings, typically this is incomplete if payment doesn’t go through or completed if it does
- Pending – force all registrations (for this event) to be set as pending regardless of payment success/failure.
- Approved – force all registrations (for this event) to be set as approved regardless of payment status
Display Description
Show the event description or not.
Display Registration Form
Show the registration form or not. This can be useful to set to no in certain situations, such as when using the Add to Cart shortcode (LINK).
Alternate Registration Page
Takes a URL to a different event. If this is set when the user clicks the link to go to this events registration page, they will be redirected to the alternative URL.
Questions for Primary Attendee
Here you can select which question groups LINK are shown to the Primary Attendee upon registration. The default Personal Information question group is always selected.
If you have any other question groups created they will show here, and you can select them as necessary.
Questions for Additional Attendees
Just like the questions for the Primary Attendee, here you can select question groups to be shown to the Additional Attendees. These questions are over ruled by the Additional Attendee Registration info? Option above, so even if you select all the question groups here, if the Additional Attendee Registration info? Option is set not to show them, then the will not appear in the registration form.
Event Category
Event categories LINK help you to split up your events into manageable groups. If you have any event categories created you can select them here.
Event Categories
The Event Categories section is separated into two tabs: Overview and Import.
Overview
From here you can see all your created categories, create new ones, and edit and delete existing ones.
The Add New Category button at the top allows the creation of new event categories.
After clicking the button you can add the following:
Category Name (required)
The name of the category, used in both the front and back end of your site.
Unique ID
You can set the category ID here, if left blank it will be automatically set for you.
Display Category Description in Event Listing?
Choose whether the category description is displayed in the event listing or not.
Category Description
A rich text editor that allows you to create a description with images, html etc.
Import
This tab allows you to upload a correctly formatted CSV file to bulk import event categories
FURTHER INFO – need more instructions on the file structure.
Registrations
The registrations section of Event Espresso provides all the attendee information you need. It is separated into 3 tabbed areas: Overview, Contact List & Reports.
This needs to be a notification box
Differences between Event Espresso 3.1.X and 4.X
Whilst in 3.1.X attendees were created individually in some cases and not at all in other cases.
4.X creates a unique attendee only once, and attaches the event and transaction details to that attendee. So whilst the overview may show an attendee multiple times, it is smart enough to recognize the attendee name and email address and attach events to that user.
Note
If the username and emails do not match exactly, a new attendee with a new attendee id will be created
Overview
Here you will find the details of all attendees registered to events.
Above the list you will find various filters to help narrow down your attendee list.
The overview consists of the following:
ID – this is the registration ID, and is different to the Attendee and Event ID.
Registration Date – The date and time when the customer signed up to the event.
Event title – The name of the event that the user signed up to.
Event Date & Time – The event start date and time.
Att # – This denotes if the registration is part of a group booking or not. If it says 1 of 1, then it is a single booking, if it says 1 of X where X is a number higher than 1, it is a group booking.
Attendee Name – the name of the attendee. If the person bought more than one ticket and the additional attendee data was either not required or the primary attendee copied all their data to the other forms, then the attendee name may be the same.
Registration code – a unique ID for that registration. If it is a group booking the id will still be unique for each ticket.
Reg Status – the current status of the registration. See here for a definition of each status. LINK TO GLOSSARY
Price – The ticket price.
Actions – 4 icons to provide more functionality:
View Registration Details
Edit Attendee Details
Resend registration details to attendee
View Transaction details.
This indicates that the Attendee is the Primary Attendee
If you hover your mouse over the Registration Date or Event Title, a submenu will appear with the following options:
View Attendee Check In List – this will display a complete list of attendees for that event, including any cancelled or incomplete attendees.
Only Show Registrations For This Event – this will display a list of all pending and complete registrations.
REVISIT THESE AREAS
Contact List
…
Reports
…
Transactions
The transactions section covers the payments each registrant has made. It consists of two tabbed areas: Overview and Reports.
Overview
This lists every transaction made.
ID – This is the transaction ID used by the plugin.
Transaction Date – The date the transaction was first made. Clicking this will open up the transactions details page.
Status – The current transaction status, please see the glossary for more details on each status.
Total – The total cost of all the tickets purchased in that registration transaction.
Paid – How much has been paid.
Primary Registrant – The name of the primary attendee (LINK TO GLOSSARY) Clicking this will open up the attendee details page.
Email Address – The primary attendees email address. Clicking this will open up your default email program.
Event – The event registered for which is also a link to that events editor screen.
Actions:
View Transaction Details – Clicking this will open up the transactions details page.
Download Invoice for Transaction – Clicking this will open up an HTML version of the invoice which can be printed. There is an option on that page to convert it to a PDF file, which can be printed or downloaded.
View Registration Details – Clicking this will send you to the Registration Details page for that particular attendee.
Send Payment Reminder – Resend an email to the primary attendee, requesting payment.
Reports
This tab provides visual data on registrations and transactions over time.
View Transaction page
By clicking either the Transaction Date or the View Transaction Details icon in the actions menu, you can open up the View Transaction page.
This page outlines everything you need to know about that singular transaction.
It covers the event and ticket options, the transaction status and the current payment status and details.
It also provides quick reference to the primary attendees contact details, and billing information and links to the additional attendee pages.
Management Section
Messages
IMPORTANT – this needs to be in a warning box
If you were previously using Event Espresso 3.1.X and had modified your email content, then you will need to recreate the emails in 4.X as they will not be transferred over when upgrading.
It is recommended to back up the email html to a text document before converting your site over to 4.X, to allow for easier transposing of the email content.
In 4.X the messaging and notification system has been completely overhauled, and is much more flexible and powerful.
One of the main ways of looking at the messaging system, is to consider the messages as groups of emails that are sent at a particular point.
For example, the Payment Reminder message, will send 2 emails, one to the admin and one to the Primary attendee. Whereas the Registration message will send 3+ emails, one to the admin, one to the primary attendee and one to each of the additional attendees.
NOTE: Custom message types cannot currently be created.
The Messages section consists of two tabbed areas: Overview and Settings.
Overview
Here you can see all the messages LINKTO GLOSSARY that are available for use and editing. The default messages consist of:
Resend Registration – a reminder email regarding the registration.
Payment Reminder – a reminder email regarding payment.
Registration – the initial registration email.
Payment – the initial payment confirmation email.
The overview list shows various bits of information about the messages:
Event – the type of event that this message is triggered on FIND OUT MORE ABOUT THIS MEANING
Message Type – The name of the message
Messenger – This is important and is where you access the various emails attached to the message type. Clicking the Email link, will always show the default admin email. Clicking the Event Admin, Primary Attendee or Attendee links will show the appropriate emails for those people.
The Edit Message Template page is discussed below (LINK)
Settings
The On/Off button on the right turns toggles whether the emails are sent via the WP-Mail function of WordPress. If turned off, you will need to have another service available to deal with sending emails.
WARN: If set to Off, absolutely NO email messages will be sent out.
Each grey box contains further information and settings for those particular messages, hover you mouse and click the arrow image to expand the boxes.
Edit Message Template
This is the heart of the individual emails. From here you can customise the email to be perfect for your recipient.
In the top left of the page is a drop down box where you can easily swap between the different emails within this message group. Remember to save any changes before swapping!
There is also a Preview button to show you a mock-up of how the email will appear to most people (note this will never be 100% due to some people not allowing images, etc. in their emails).
Messages Shortcodes can be used in all the fields on the edit message template page.
To – Required. Who the email will be sent to, you can use the shortcodes here or enter a direct email address.
From – Required. Who the email is coming from, you can use the shortcodes here or enter a direct email address.
Subject – The subject line of the email, shortcodes can also be used here.
Attendee List – Currently only available on Admin related emails. Here you can style how the attendee data is shown to the admin. Shortcodes can be used here.
Event List – This section creates the content for the [EVENT_LIST] message shortcode, which is normally added to the Main Content section.
Main Content – This section is where you can add the non-event information, such as company branding, contact information etc. The event related data can be inserted vie the messaging [EVENT_LIST] shortcode.
Update Actions:
Override all custom – WHAT DOES THIS DO???
Save and Close – save your changes and return to the Messages Overview
Save – save your changes and stay on the same page.
Extra Actions:
To – WHAT DOES THIS DO EXACTLY? THOUGHT IT WAS FOR EXTA EMAILS, BUT SEEMS NOT TO BE THE CASE – IS IT JUST FOR THE TEST SEND PURPOSES?
Reset Templates – reset the message template back to the default settings and content.
Test Send – sends a test email to the email address in the To field.
Valid Shortcodes – these shortcodes insert various information into the emails. Only usable in messages, not in events.
Registration Form
Here you will find all the questions available to use.
Note: In Event Espresso 4.0 custom questions will not be available initially.
Settings Section
General
The general settings page covers most of the site wide settings that you will need. It is split up into 6 tabbed areas.
Critical Pages
This section lists the pages that Event Espresso needs in order to function. Should you wish to change a page that is used you will need to move the shortcode to the new page and then allocate it here. Otherwise your registrations will not work correctly.
This section also provides a status of the page to show you at a glance if something is not right.
Templates
This section deals with the general front end settings.
Event Listings:
These settings affect the main event listings and any listings provided by the [EVENT_LIST] shortcode
Display Descriptions – toggle the event descriptions on or off
Use SHORT Descriptions – if your event description contains a MORE tag, setting this to yes will cut off the event description at that point. Otherwise the full description is shown.
Display Addresses – toggles the address on or off.
Registration Pages:
These settings affect individual event registration pages.
Display Addresses – toggles the address on or off.
Use the Custom Post Types feature – If set to yes, posts will be created with your event details as well as the event itself. Useful for adding into your blog feed.
Themes & Styles:
These settings affect the overall look of the events.
Use Built-in Style Sheets – turns on Themeroller and the default stylesheet. If you want to use your own custom styles or let the theme style the events, set this option to no.
Themeroller Style – choose a Themeroller style to change the looks of your events. This will only work if Use Built-in Style Sheets is set to yes.
Add a custom style sheet – upload a custom stylesheet. This will only work if Use Built-in Style Sheets is set to yes.
Google Maps
This section provides numerous options for the Google maps that can be added to events.
Reg Page Map Settings
Options for maps displayed on single event registration pages.
Set Map Width – the map width in pixels. Please just use a number and no additional information like px
Set Map Height – the map height in pixels.
Set Map Zoom level: Range 1 – 19 – this is the default zoom level for the map.
Set Map Navigation Overlay
Keep Map Navigation Small
Set Map Type Control Default Horizontal Dropdown
Set Map Alignment None Align Left Align Center Align Right
Events List Options
Set Map Width
Set Map Height
Set Map Zoom level: Range: 1 – 19
Set Map Navigation Overlay
Keep Map Navigation Small
Set Map Type Control Default Horizontal Dropdown
Set Map Alignment None Align Left Align Center Align Right
Use map in template files ( No Shortcodes )
Your Organization
This whole settings tab is about you and your organsation, as well as some core Event Espresso details.
Licences
This section also contains an area to add your Event Espresso licence key to allow you to get one click updates whilst you have a currently valid licence.
Contact Information and Company Logo
The contact details that you add here, including the logo, will be used in various places most prominently invoices.
Event Espresso User eXperience Improvement Program
This is an optional system to help us to improve your Event Espresso experience.
By opting to send us anonymous secure data, we will be able to tell general patterns about the plugins usage meaning we know what areas of the plugin most of our customers are using and we can put focus on improving those areas.
Admin Options
WordPress Dashboard
Upcoming Events Widget
Activates/de-activates the Upcoming Events Widget in the WordPress Dashboard so that you can see a list of upcoming events as soon as you log in.
How many days into the future?
Defines how far in the future the Upcoming Events Widget will show, in days.
Date and Time Settings
Clarification of the current date/time settings and a link the the WordPress settings.
Please note that the date and time settings are, for the most part, controlled by the WordPress settings.
Debug/Logging Options
Enable full logging
This will turn on/off the logging system to help with debugging. Th file is available at: /wp-content/uploads/espresso/logs/
Warning!
Please use caution when using this feature. These files may be publicly available.
Also, please remember to turn this off after use, otherwise the file may grow very large.
Enable Remote Logging
Enables the logging file to be sent to another location.
Remote Logging URL
If the above is set to yes, this is the url where the file will be sent to, it must be a write enabled location.
Promote Event Espresso
You can help Promote Event Espresso by displaying a link to our site on each of your events. You can even generate commissions on every sale that comes from one of your links.
Link to Event Espresso in your Registration Page
This turns the link to Event Espresso on or off.
Event Espresso Affiliate ID
If you have the above on and you enter your affiliate ID here, then any sales that resulted from someone visiting Event Espresso via your affiliate enabled link will gain you a commission.
Payment Methods
This section allows you to set which forms of payments will be displayed to a user if the event has a price other than zero.
Payment Methods
This tab shows the core payment gateways and there settings.
Clicking one of the gateways listed at the top shows the individual gateways activation option, and then the settings.
A gateway must be activated before it can be used. A grey cog icon means the gateway is not active, a green coloured cog means the gateway is active.
You can find out more about each gateways settings here INSERT LINK.
Settings
This tab controls site wide gateway settings that span across different gateways.
Allow Payment-retry for Pending and Deferred Payments
If a payment is marked as ‘Pending Payment’, or if payment is deferred (ie, an offline gateway like Check, Bank, or Invoice is used), then give registrants the option to retry payment.
Extras Section
Help/Support
This whole section provides different resources and links to guides, how to’s, basic shortcodes and support to help you if you ever get stuck.
How to Get a List of Attendees for my Event
In this post we’ll learn how to retrieve a list of people (attendees) who are attending a specific event. Let’s get started!
Begin by logging into your WordPress Admin. Next locate Event Espresso in the WordPress admin menus and then click on Registrations. The registrations screen shows all registrations that have been created with Event Espresso. Locate one registration that is for your specific event. Next hover over the name of the event and a link for View Registrations will appear. Click on that link and you’ll be taken to a page that shows active registrations for your event.
There is also another way to get a list of attendees (registrants). You’ll need to be logged into your WordPress admin. Then locate Event Espresso in the WordPress admin menus and click on Events. Locate your event on this screen and hover over the name of your event. Several links will appear: View, Edit, Registrations, Export, and Trash. Click on the Registrations link and this will take you to a page which shows all active registrations.
You may notice that your registrations are currently split amongst multiple pages. This is due to the pagination option and it can easily be adjusted. While viewing this page, locate and click on the Screen Options tab which appears in the top right corner of the screen. Then you can adjust the number of registrations that should be shown per page. Once you have updated the value, click on the Apply button. Another method of seeing all of the registrations for this event in one place is to use the Registrations CSV Report button. This button can be found by scrolling down to the bottom of the page. Clicking on it will create and download a report of all active registrations as a CSV file.
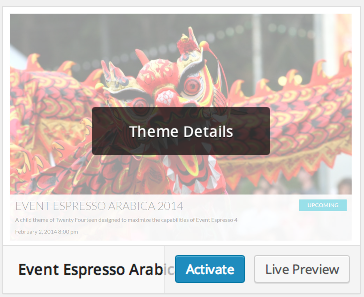
How to Setup the Event Espresso Arabica Theme
In this guide we will cover how to setup the Event Espresso Arabica theme.
For this guide, you’ll need to have an SFTP or FTP client as well as login information to access your WordPress root. Cyberduck and FileZilla are both free FTP / SFTP clients and are available for multiple platforms. Your login information is available from your web host.
Begin by logging into your WordPress site with your FTP / SFTP client. This will usually drop you in a public_html folder or the WordPress root. Browse to the following location:
/wp-content/plugins/event-espresso/templates
You should now see the Arabica theme for Event Espresso. Download the Espresso_Arabica_2014 theme to your local computer. We’ll now need to browse to our WordPress themes folder:
/wp-content/themes
Now upload the Espresso_Arabica_2014 folder to your WordPress themes folder above. After the upload has completed, login to your WordPress Admin. Locate Appearance in the WordPress admin menus and then click on Themes. This will take you to the themes page. Locate the Event Espresso Arabica 2014 theme and click on Activate.
Then return to the front end of your site and head to your events list page to see your new theme in action.
How to Setup Event Espresso and Publish Your First Event
In this guide, we will learn how to setup Event Espresso and publish your very first event. It is recommended that you work through the guide completely but if you have already completed certain steps, then feel free to skip ahead as needed.
Install and Activate Event Espresso
Let’s get started by installing and activating Event Espresso. The latest version of Event Espresso can be downloaded from your Event Espresso account. Open a new tab in your web browser and go to EventEspresso.com. Then click on the Account link and login to your account. You will now be viewing your account page. Locate Event Espresso in your My Plugins list and click on it. This will download the current version of Event Espresso to your computer.
Now open another tab in your web browser and login to the WordPress admin for your site. Here is an example of what the URL for the WordPress admin looks like (replace example.com with your actual site URL):
http://example.com/wp-admin/
After logging in you’ll be viewing the dashboard for your WordPress admin. Locate Plugins in the WordPress admin menus and then click on Add New. From the Install Plugins page, click on Upload. Then click on Choose File and locate the Event Espresso plugin on your computer (it is a .zip file). Finally click on Install Now. Your WordPress site will begin uploading the file and will automatically install Event Espresso. After it is done, it will prompt you to Activate the plugin or return to the WordPress Plugins page. Click on Activate. In the next section, we’ll cover how to add information about our organization to Event Espresso.
Update the Your Organization Page
The Your Organization page allows you to customize information for Event Espresso. This page can be found by locating Event Espresso in the WordPress admin menus and then locating Settings and clicking on General Settings. This page has the following areas: Your Event Espresso License Key, Contact Information, Company Logo, Social Links, and User eXperience Improvement Program (UXIP).
Your Event Espresso license key can be found on your Account page for Event Espresso. In your web browser switch to the original browser tab for your Account page. Then locate the Account Settings widget and copy your site license key. Next, switch to the browser tab for your WordPress admin. Then paste your license key in the field for Support License Key. This will enable one-click updates for your Event Espresso plugin and its add-ons.
Now we need to update the information about our business / organization. This can be done in the next section of the page for Contact Information. Go ahead and update all fields and remove any information that is not needed. Note: the country that is selected will affect the currency options that are used through out Event Espresso.
Next you can upload a logo for your organization (if available) using the option in the Company Logo area. A size of 400 pixels wide or smaller is recommended. Additionally, you can add links to your social networks using the fields in the Social Links area. The last area is for the User eXperience Improvement Program (UXIP). It is a way for you to contribute to Event Espresso. You can turn this option off or leave it on (recommended). Now you are done updating the Your Organization page and you can click on the blue Save button to save your changes. We are now ready to setup a payment method so that we can accept payments for our event registrations.
Setup a Payment Method
The Payment Methods page can be found by locating Event Espresso in the WordPress admin menus and then locating Settings and clicking on Payment Methods. For this guide, we’ll setup PayPal Standard which is a popular payment gateway that is used with Event Espresso. More information about payments for Event Espresso can be found in the article for: How to Accept Payments with Event Espresso.
Locate PayPal Standard in the list of payment methods and click on it. Then click on the Activate PayPal Standard Payments button. This will activate PayPal Standard payments on your site and you’ll be shown the following options:
- PayPal Email
- Country Currency
- Image URL
- Use the Debugging Feature and the PayPal Sandbox
- Shipping Address Options
- Button Image URL
Enter your Email for your PayPal account. It is recommended that you use a PayPal Premier or Business account (preferred). Next, select your Country Currency. This is the currency that you want to accept payments in. The Image URL option allows you to add a logo for your organization / business to the PayPal payment page. Next, you can enable the Debugging Feature (keep disabled when not needed). The Shipping Address Options setting allows you to specify if you would like a shipping address to be collected during registration checkout. The Button Image URL shows the current image that will be shown for PayPal Standard during registration. You can upload and select a new image or leave it as is. Now double-check that you have updated all fields as needed and then click on the Update PayPal Standard Settings button. We are now ready to create our first event with Event Espresso.
Create our First Event using the Event Editor
The Event Editor can be found by locating Event Espresso in the WordPress admin menus and then clicking on Events. Once on the Events Overview page, click on Add New Event button which appears at the top of the screen. In the example event that we’ll be using, we’ll focus on these areas of the Event Editor: Event Title, Event Description, Event Tickets & Datetimes, Event Registration Options, and Save New Event. Information about these options and others in the Event Editor can be found in the Help tab which appears in the top right corner of the screen.
Information for our example event:
- Title: Spring Concert Celebration
- Description: Come kickoff spring with a fun evening of music and food.
- Event Start: March 22nd, 2014 at 7pm
- Event End: March 22nd, 2014 at 10pm
- Event Limit: 500
- Free Ticket: no charge
- Premium Ticket: $20, allows early admission at 6pm
Begin by entering a title or name for your event. This should be descriptive as it will be shown in various areas of Event Espresso including the WordPress admin and on the front end. Next, enter a description for your event. Event Espresso supports the rich text editor in WordPress so you can format your description using the toolbar that appears above the description area. Now scroll down to the option for Event Tickets & Datetimes. In this section we’ll setup a datetime and tickets for our events. Click on the Event Start field and change it to the date and time that your event begins. Next, click on the Event End field and change it to the date and time that your event ends. You can optionally set a limit on the number of tickets that you want to be available for this event. We are now ready to setup tickets for our event. By default a Free Ticket will be created for our event. If you will be offering free tickets for your event, then you can begin editing the options for this ticket. Update the Ticket Name, Goes On Sale, Sell Until, and adjust the quantity. If you will not be offering free tickets, you can update the existing options for this ticket to convert it to a paid ticket.
Next, locate the Event Registration Options widget. The active status will show unknown since we are currently creating a new event. The next option allows you to specify the maximum number of tickets that can be bought per order. For example, if you wanted to limit a registrant (attendee) to buying 5 tickets at one time, then you would enter a 5 in the field. The field for Alternate Registration Page is useful if you want attendees to register through a separate URL. If you are new to Event Espresso, then leave this field blank. Next, you can enter a phone number (optional) for your event. Then you’ll want to select the Default Registration Status. A status of Pending Payment is recommended since it will allow your registrants (attendees) to make payments (if necessary). You can learn about the other options by viewing the help tab for the Registration Form Settings page.
Now double-check that your event information is correct: Title, Description, Event Tickets & Datetimes. Then locate the Save New Event widget and click on the Save Draft button to review your event later or click on the Publish button to make your event live.
Congratulations on publishing your first event with Event Espresso! Now browse to your event on your website to see how it will appear to your registrants.
How to Show the Events List Page in your Website Navigation
Today you’ll learn how to add a link to the Events List page to your navigation for your website. This will allow your website visitors to quickly reach your events list page from any page or post on your site.
Begin by logging into your WordPress admin. Then locate Appearance in the WordPress admin menus and click on Menus. This will take you to the Appearance Menus Screen.
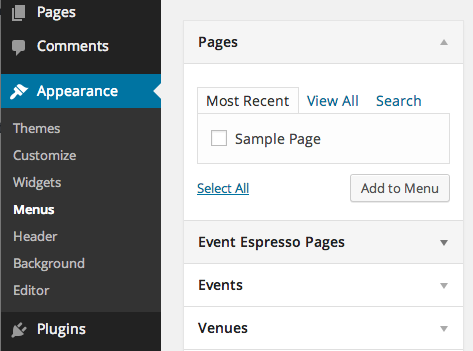
Along the left side of the screen you’ll see options for WordPress pages, posts, categories, tags, and Event Espresso content. If you do not, then you can enable these options by clicking on the Screen Options tab which appears in the top right of the page. Place a checkmark in the options that you would like to appear. The following options are recommended for Event Espresso:
- Events
- Venues
- Event Categories
- Venue Categories
- Event Espresso Pages
Now we are ready to add the Events List page to our site’s navigation.
Click on the option for Event Espresso Pages. This will expand to show available options. Now place a checkmark next to Event List and click on the Add to Menu button. This will add a link to your Event List page to your current menu. You can further customize the navigation label and setup a title for your event list page.
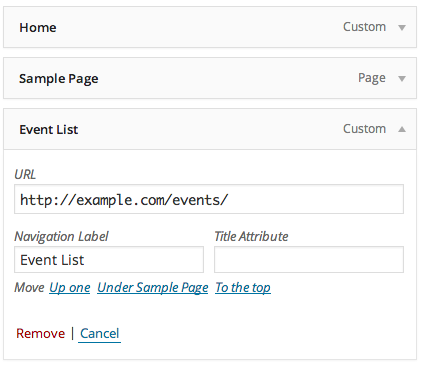
Once you are done making changes, be sure to click on the Save Changes button. Then visit your website on the front end and you should see your event list page as part of your website navigation.
Pro-tip: You can use the steps above to add a specific event to your website’s navigation. Instead of clicking on Event Espresso Pages, you’ll want to click on Events. Then place a checkmark next to your event and finish adding it to your current menu.
How to Accept Payments with Event Espresso
Today you’ll learn how to accept payments with Event Espresso. Event Espresso supports a handful of payment gateways and these can be setup by going to WordPress admin –> Event Espresso –> Payment Methods. Your screen will appear similar to the screenshot below:
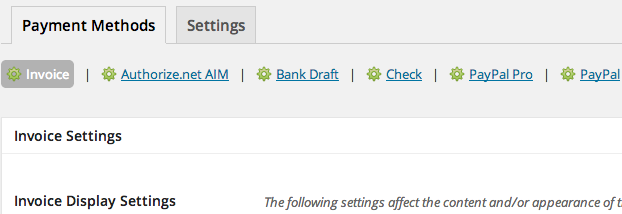
In the above image we see five core payment gateways for Event Espresso: Invoice, Authorize.net AIM, Bank Draft, Check, PayPal Pro, and PayPal. A green gear icon means that this payment gateway is currently activated for Event Espresso. If you see a white gear, this means that this payment gateway for Event Espresso is deactivated and you can activate it by clicking on the name of the payment gateway and then clicking on the green activate button.
When a payment gateway is activated, you’ll be presented with various options for configuring your payment gateway. You can refer to the help tab on the Payment Methods page in Event Espresso to view specific instructions for your payment gateway. After configuring your payment gateway, be sure to save changes by clicking on the blue Update Settings button. There are also some links below to documentation for popular payment gateways that are used with Event Espresso:
- Invoice
- Authorize.net AIM
- Bank Draft
- Check
- PayPal Pro
- PayPal
Offsite Payments vs. Onsite Payments
Event Espresso offers options to accept payments on your site and offsite. Lets begin by using twos examples to illustrate the primary difference between offsite payments and onsite payments.
Example A (offsite payments): Arrive at site –> Browse to events pages –> Click on event that you want to register for –> Select your ticket options –> Enter your attendee information and continue to payment options –> Select an offsite payment option and be transferred to payment processor to complete payment –> Return to website to finish registration.
Example B (onsite payments): Arrive at site –> Browse to events pages –> Click on event that you want to register for –> Select your ticket options –> Enter your attendee information and continue to payment options –> Select an onsite payment option and complete payment and finish registration.
The registration process for a website with onsite payments appears similar to Example A but take note of what happens towards the end of the steps for Example B. We see that an attendee remains onsite for the payment process which means a quicker registration.
PayPal Standard is an example of an offsite payment gateway. When you select to pay with PayPal Standard, you are temporarily brought to a secure PayPal.com page to complete payment. Afterwards you are brought back to the website to finish up registration.
Authorize.net AIM is an example of an onsite payment gateway because the entire payment process takes place directly on your site.
Pro-tip: Offer multiple payment methods to make payments convenient for your customers.
Requirements for Onsite Payments
Accepting payments onsite has some additional requirements.
Your website will need to have a dedicated SSL certificate and be in compliance with PCI Data Security Standard (PCI DSS). Specifically, this means that your business adheres to the PCI DSS requirements for security management, policies, procedures, network architecture, software design and other critical protective measures. This standards ensure that your customers’ financial information is secured. More information about PCI DSS requirements is available here.
Understanding Your Account
Congratulations for downloading Event Espresso, the most powerful online event registration and ticket sales software plugin for WordPress.
We’d like to take a moment to introduce you to your Event Espresso Account. Please refer to the below image as you reference each item on your account. You can also click the image to view it in more detail.

1. Profile Image
By default we use your account email address to try and associate your account with your Gravatar profile. If you do not have a Gravatar profile, a default profile image will be chosen for you.
2. Quick Links
With the Edit Account Details link you can edit your account details such as your name, email address, password, etc. The Support Forums link will navigate your browser to the support forums. The Logout button will end your logged-in session on EventEspresso.com. You will be required to log into your account when you return to EventEspresso.com/login.
3. Quick Downloads
You can click each bubble to download a plugin zip file or scroll to the Downloads section at the bottom of your account.
4. Support Notifications
You will be notified on your account of special messages that apply to a majority of Event Espresso users. These messages may range from urgent support notices or special messages from the Event Espresso team.
5. Recent News
You will be notified of news posted to the Event Espresso blog.
6. Subscribed Support Topics
This is an archive of the support forum discussions that you have subscribed to. You will receive an email notification from EventEspresso.com when a new comment has been posted to a discussion. You can subscribe to a topic by clicking the “Follow” button on any forum discussion page.
7. Bookmarked Support Topics
This is an archive of the support forum discussions you have bookmarked for future reference. You can subscribe to a topic by clicking the “Favorite” button on any forum discussion page.
8. My Support Topics
This is an archive of quick links to the support topics that you have created on the support forums.
9. Account Status & Settings
You will see a message that displays your account type, the expiration date and renewal notices. At 30 days before your account expires, you will receive a notice on your account that your support license is expiring, and you will be given special pricing to renew your license.
10. Premium License Key
Premium license keys enable you to receive automatic upgrades for all Event Espresso products in your account. Adding your license key to the General Settings > Support License setting of Event Espresso will activate your license key. You will then be allowed to download new releases of Event Espresso.
One-click upgrades will only work on one installation of WordPress per license key, so you will want to choose which site you want to use your license on for one-click upgrades. If this is a development or test site, please DO NOT enter your Support License Key. Save it for the live production site, otherwise you will unnecessarily run into issues with needing to have your key reset. If you need more than one license key we recommend purchasing the developer license or contacting us to try and arrange two license keys on your account.
Requests Reset – If you receive a notification that there is an update for Event Espresso but that your license key is not active or can only be used on one account AND your support license is active (not expired) then request that we reset your license key to try and resolve the error. If you have used your support license key on a development website and now need to re-associate your license key to the live website, you can request a reset from this widget.
With a premium license key you will also have access to Pre-release Channel downloads and updates.
11. Free License Key
License keys that are appended with “_FREE” can only be used for downloading Event Espresso Lite. These license keys can be used as many times as you want. Using a license key from EventEspresso.com will give you access to free Event Espresso Lite downloads. If you try to use a free license key in the premium version of Event Espresso you will receive an incorrect license key notification.
12. Redeem Premium Support
If you have purchased priority support, you will have a notification on your account to complete a form to start the process to get priority assistance. You will be asked for a description of how we can help you and also credentials to your website.
If you have not purchased priority support, you will not see this widget area. After the issue related to your support token is resolved, or the time allotted to your support token(s) is used or expires this widget area will be removed.
13. Downloads & Documentation
Clicking the disk icon will download that plugin zip file that you can install on your website. You can also click the name of the file to download the file.
Clicking the note icon will link you to the documentation page about that download.
Transactions (ver 4.0+)
Transactions
The transactions section covers the payments each registrant has made.
Overview
This lists every transaction made.
ID – This is the transaction ID used by the plugin.
Transaction Date – The date the transaction was first made. Clicking this will open up the transactions details page.
Status – The current transaction status, please see the glossary for more details on each status.
Total – The total cost of all the tickets purchased in that registration transaction.
Paid – How much has been paid.
Primary Registrant – The name of the primary attendee (LINK TO GLOSSARY) Clicking this will open up the attendee details page.
Email Address – The primary attendees email address. Clicking this will open up your default email program.
Event – The event registered for which is also a link to that events editor screen.
Actions:
- View Transaction Details – Clicking this will open up the transactions details page.
- Download Invoice for Transaction – Clicking this will open up an HTML version of the invoice which can be printed. There is an option on that page to convert it to a PDF file, which can be printed or downloaded.
- View Registration Details – Clicking this will send you to the Registration Details page for that particular attendee.
- Send Payment Reminder – Resend an email to the primary attendee, requesting payment.
Registrations (ver 4.1+)
Event Espresso version 4 Documentation for Registrations(In Progress)
The registrations section of Event Espresso provides all the attendee information you need. It is separated into tabbed areas: Overview and Contact List.
Differences between Event Espresso 3.1.X and 4.X
Whilst in 3.1.X attendees were created individually in some cases and not at all in other cases.
4.X creates a unique attendee only once, and attaches the event and transaction details to that attendee. So whilst the overview may show an attendee multiple times, it is smart enough to recognize the attendee name and email address and attach events to that user.
Note: If the username and emails do not match exactly, a new attendee with a new attendee id will be created
Overview
Here you will find the details of all attendees registered to events.
Above the list you will find various filters to help narrow down your attendee list.
The overview consists of the following:
ID – this is the registration ID, and is different to the Attendee and Event ID.
Registration Date – The date and time when the customer signed up to the event.
Event title – The name of the event that the user signed up to.
Event Date & Time – The event start date and time.
Att # – This denotes if the registration is part of a group booking or not. If it says 1 of 1, then it is a single booking, if it says 1 of X where X is a number higher than 1, it is a group booking.
Attendee Name – the name of the attendee. If the person bought more than one ticket and the additional attendee data was either not required or the primary attendee copied all their data to the other forms, then the attendee name may be the same.
Registration code – a unique ID for that registration. If it is a group booking the id will still be unique for each ticket.
Reg Status – the current status of the registration. See here for a definition of each status. LINK TO GLOSSARY
Price – The ticket price.
Actions – 4 icons to provide more functionality:
- View Registration Details
- Edit Attendee Details
- Resend registration details to attendee
- View Transaction details
This star icon indicates that the Attendee is the Primary Attendee ![]()
If you hover your mouse over the Registration Date or Event Title, a submenu will appear with the following options:
- View Attendee Check In List – this will display a complete list of attendees for that event, including any cancelled or incomplete attendees.
- Only Show Registrations For This Event – this will display a list of all pending and complete registrations.
Contact List
The contact list tab provides a simplified overview of the attendees, showing their contact details